Effective Ways to Braise Meat for Delicious Meals in 2025
Braising is a time-honored method favored by chefs and home cooks alike, renowned for its ability to turn tougher cuts of meat into tender, flavorful delights. Understanding how to braise meat properly can elevate your culinary repertoire. In this article, we’ll delve into the essential braising techniques, including how to choose the best cuts and the perfect cooking liquid, ensuring your braised dishes—whether it’s beef, chicken, or lamb—are guaranteed crowd-pleasers. Let’s explore effective ways to braise meat that yield mouthwatering results every time.
Understanding Braising Techniques
Braising is a combination cooking method that involves browning meat and then slow-cooking it in a small amount of liquid, allowing flavors to deeply infuse. The process typically involves two main stages: **high heat searing**, which creates a beautiful crust and develops complex flavors, followed by **simmering meat** covered in broth or wine. Using the right **braising techniques** can mean the difference between a mediocre dish and a culinary masterpiece.
Choosing the Right Cuts for Braising
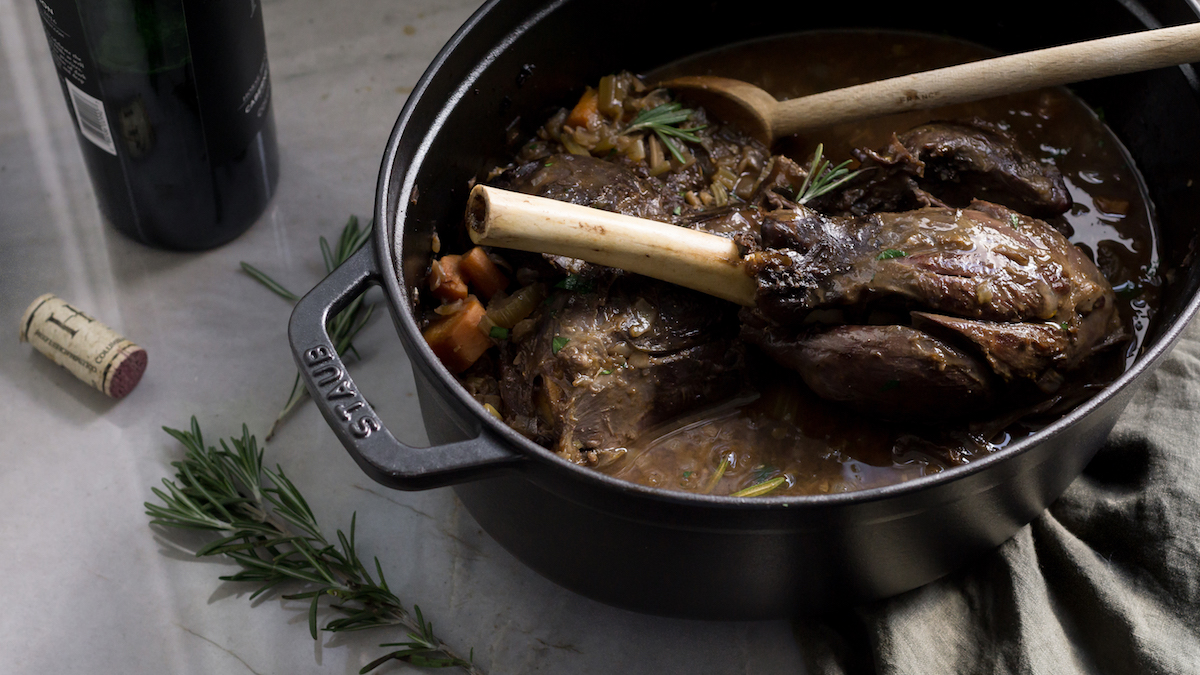
Not all cuts of meat are created equal when it comes to braising. For the best results, select **best cuts for braising** that are generally tougher yet rich in connective tissue. Common choices include **braising beef** like chuck roast or brisket, **braising pork shoulder**, and even **braising lamb** shanks. The slow cooking process helps to break down these tough fibers, resulting in tender and juicy meat. Aim for cuts that contain more fat and collagen, as these attributes contribute to the overall flavor and texture of your dish.
Selecting the Right Cooking Liquid
When it comes to braising, the **liquid for braising** plays a vital role. The main liquid sources can range from stock to wine, or even a combination of both. Braising with wine is a popular method as it brings acidity and enhances the **flavor development**. Whether you choose a rich red wine or a light white, make sure it complements the protein you are braising. Adding aromatics such as onions, garlic, and herbs to your **braising liquid** can also enhance the overall taste of your dish.
Practical Steps for Perfect Braising
Now that we’ve covered cuts and liquids, let’s focus on further practical steps to ensure a **perfect braise**. The first step involves **marinating for braising** if you have the time, as this can imbue additional flavors before cooking even begins. Moreover, proper **temperature control** is key—maintaining a steady low temperature allows for consistent cooking without drying out the meat.
Step-by-Step Braising Process
Here’s a quick guide to mastering the **braising process**:
- Sear your meat: Start with a **braising pot** like a Dutch oven over medium-high heat. Add oil and sear the meat on all sides until browned. This creates a rich crust and enhances flavor.
- Add aromatics: After removing the meat, add diced onions, carrots, and celery to the pot and sauté until softened.
- Deglaze the pan: Pour in a suitable **cooking liquid** (like wine or stock) to deglaze, scraping up any browned bits stuck to the bottom. These bits are full of flavor!
- Add the meat back: Return the seared meat to the pot and add additional herbs and spices as desired.
- Cover and cook: Place the lid on and let it **cook low and slow** in an oven or on the stovetop until it’s fork-tender. This can take anywhere from 1.5 to 4 hours, depending on the type and size of the meat.
Enhancing Flavor Through Spice and Aromatics
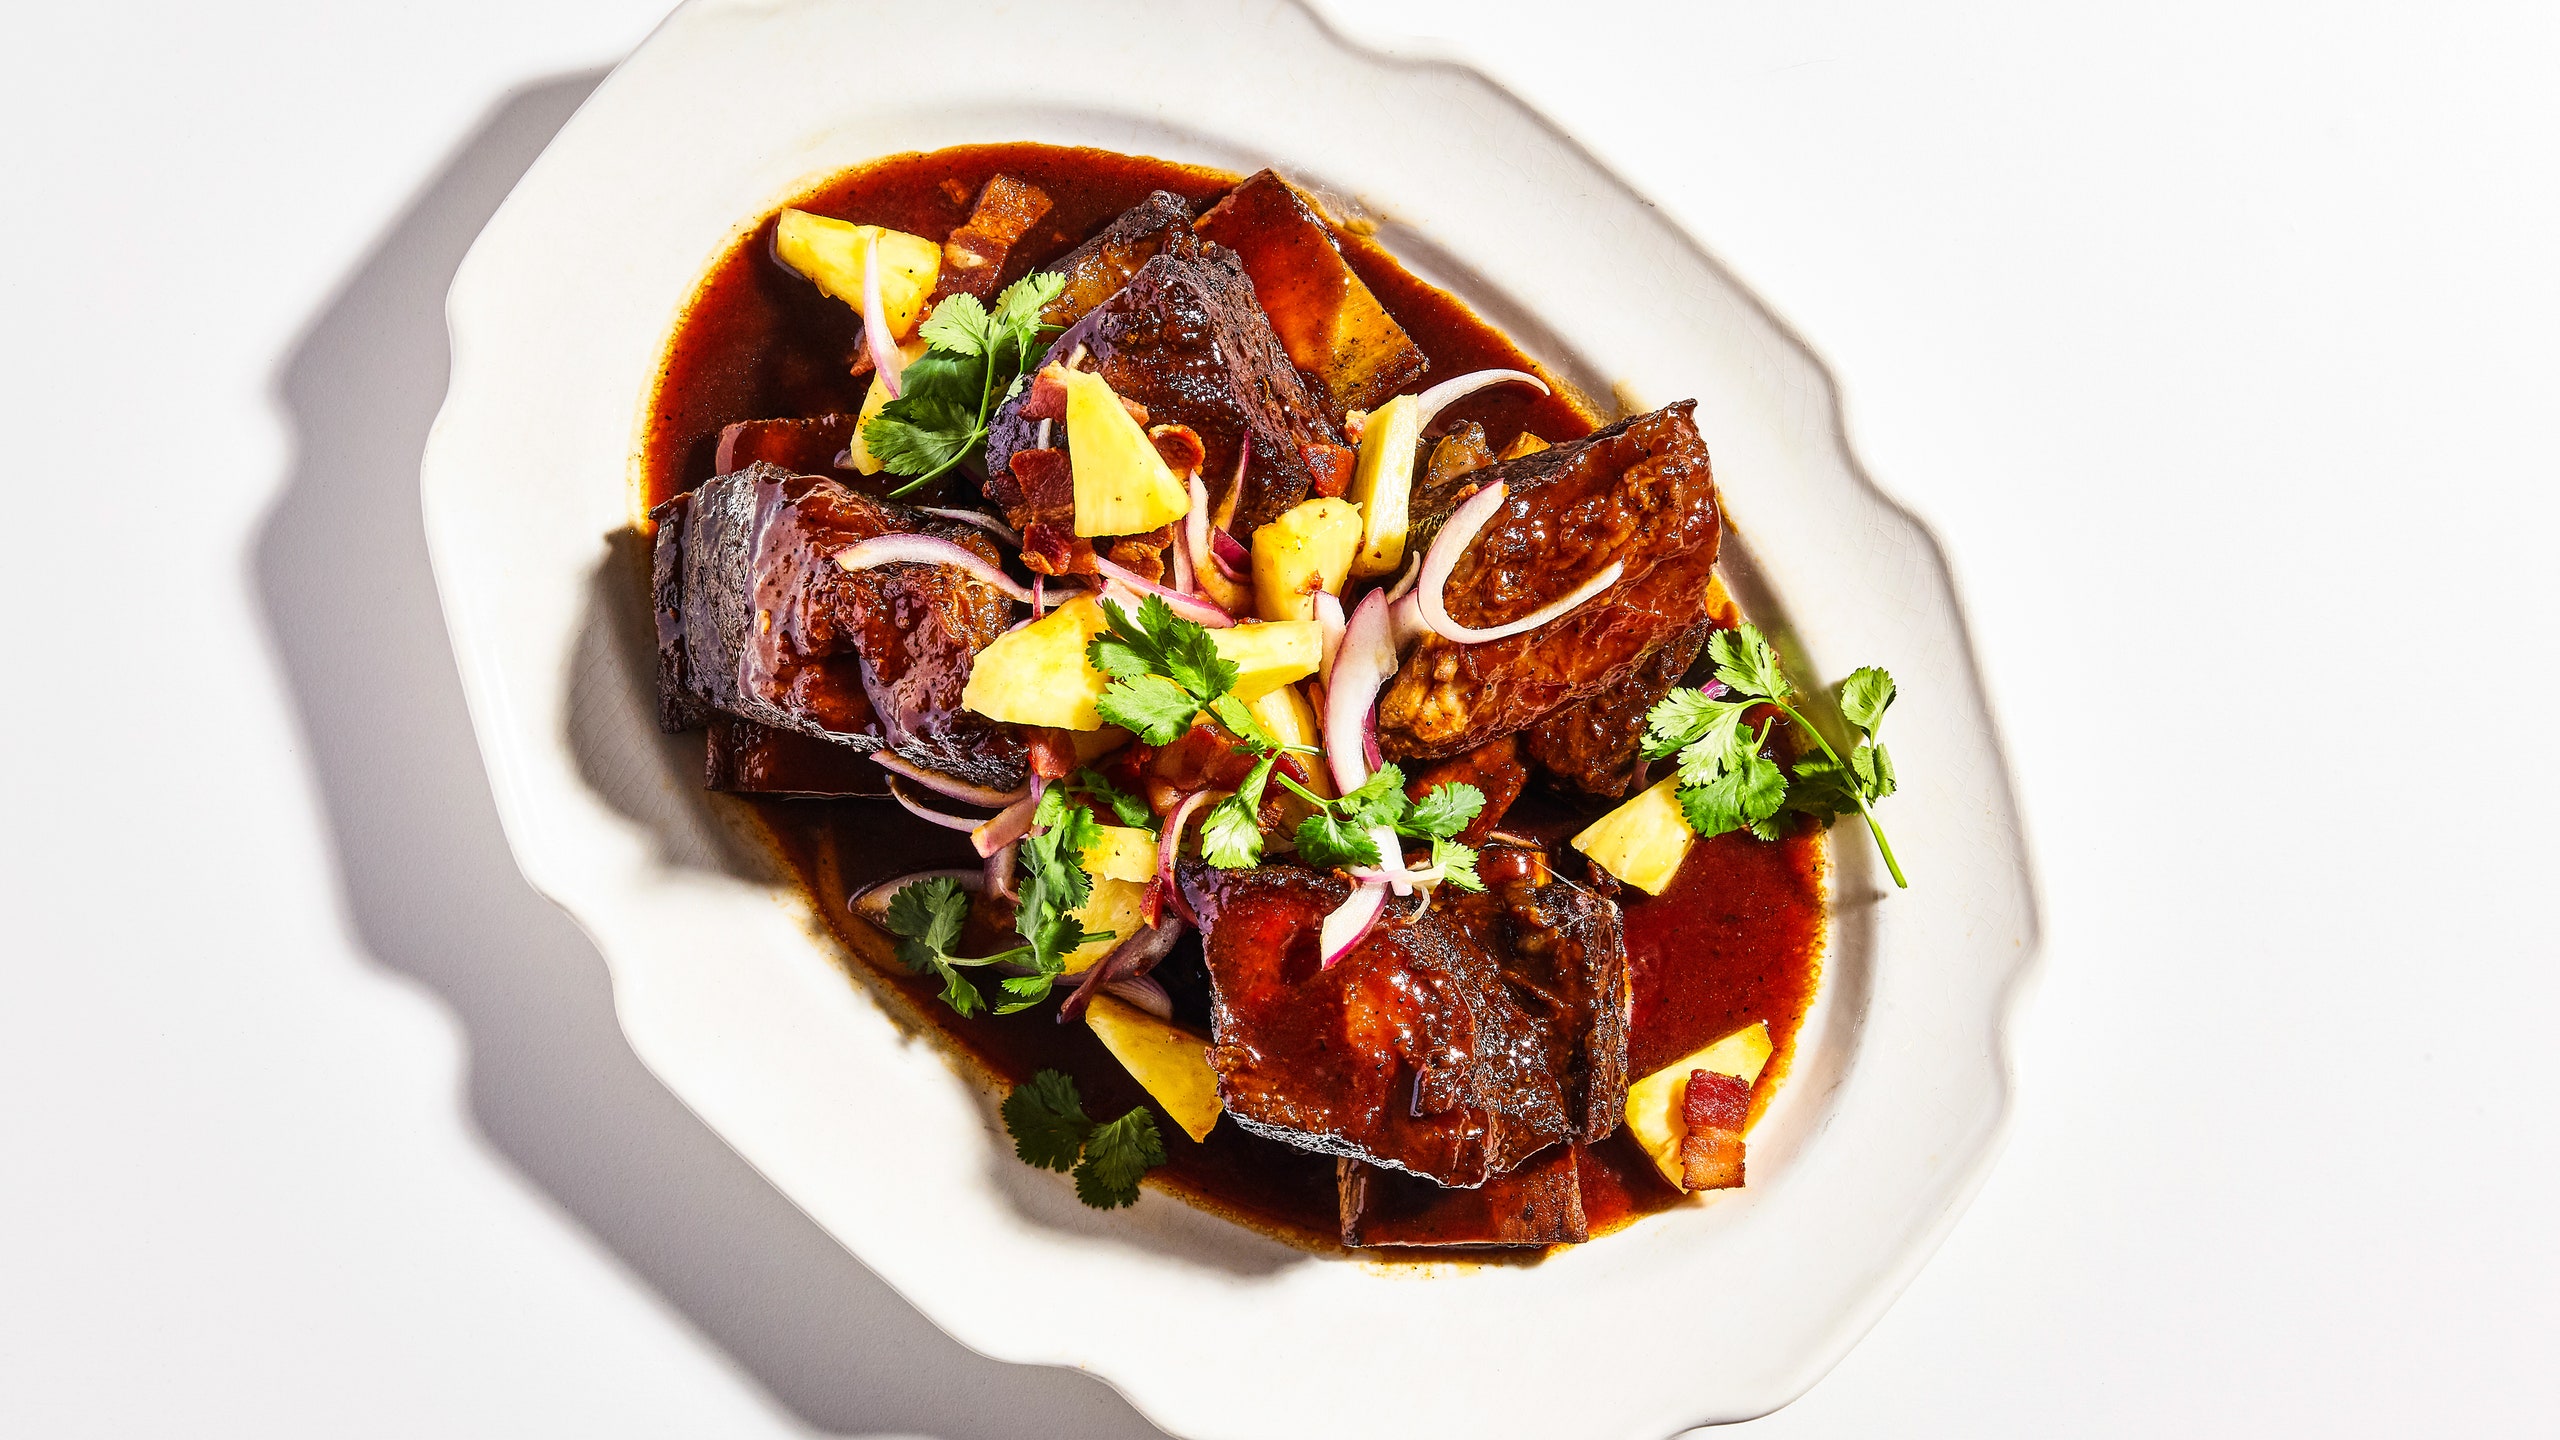
Incorporating the right **braising spices** and herbs can elevate the flavor profile of your **braised dishes**. Think outside the box; alongside classical herbs like bay leaves and thyme, consider spices like star anise or orange zest for a unique twist. Using **aromatics for braising** not only adds flavor but also creates a fragrant cooking experience that melds beautifully with your chosen meat.
Common Mistakes and How to Avoid Them
Braising is a straightforward technique, yet some common mistakes can undermine your efforts. Understanding these pitfalls is crucial for achieving mouthwatering results every time. Incorrect **meat selection for braising** can result in a tough texture, while neglecting to use enough cooking liquid can lead to dryness. Ensure your pot always has enough moisture to keep the meat submerged during cooking.
Time and Temperature Management
Effective braising demands mindfulness of both time and temperature. While the concept of **slow cooking** might suggest longer is better, overcooking can lead to mushy meat. Monitor your **braise time** closely, and use a meat thermometer to check for desired doneness. For example, beef should reach an internal temperature suitable for medium-rare as indicated in your recipe. The right **overall cooking time** can vary depending on the cut size, thickness, and even your cooking method.
How to Thicken Your Braising Liquid
Once your meat is cooked to perfection, the next step involves creating a rich and flavorful sauce. To achieve a desirable consistency, consider **thickening your braising liquid**. Common methods include reduction through simmering or adding a cornstarch slurry (cornstarch mixed with water). The goal is to transform your cooking liquid into a luscious sauce that coats the braised meat beautifully.
Serving and Enjoying Braised Dishes
After all that hard work, serving your braised meal appropriately can enhance the dining experience. Pair your delicious braised meat with sides that complement its rich flavors; think creamy mashed potatoes or roasted root vegetables. When serving **braised short ribs** or **braised pork shoulder**, ensuring each plate includes a scoop of that velvety sauce ties everything together, creating a lovely harmony in your meal.
Seasoning for Serving
Before serving your tender, lovingly cooked dish, don’t forgot to adjust your seasoning. Adding a touch of salt or a dash of **braising sauce** just before serving can brighten flavors. Fresh herbs sprinkled on top can also add a pop of color and a fresh finish which enhances the overall appeal of your dish.
Tips for Storing Braised Leftovers
If you have leftovers, remember that braising often improves flavor upon reheating. Store the braised meat and sauce together in an airtight container in the refrigerator for up to three days or in the freezer for longer storage. Gently reheat the braise on the stovetop, adding a touch of cooking liquid to prevent it from drying out.
Key Takeaways
- Choose tougher cuts for optimal braising results.
- Utilize a flavorful cooking liquid, preferably wine or stock, paired with aromatics.
- Mind your time and temperature to avoid overcooking.
- Thicken your braising liquid for a delicious sauce to serve with your dish.
- Store leftovers to enhance flavors and enjoy them later.
FAQ
1. What types of meat are best for braising?
The **best cuts for braising** are those that are tough and have a lot of connective tissue. Some popular options include chuck roast, brisket, pork shoulder, and lamb shanks. These cuts benefit most from the slow cooking process.
2. How do I know when my braised meat is done?
Your braised meat is done when it is fork-tender, which typically means it has reached an internal temperature appropriate for its type (beef ideally becomes tender at around 195°F to 205°F). Using a meat thermometer can help ensure the right **meat doneness**.
3. Are there alternatives to wine for braising liquid?
Yes! While **braising with wine** is popular, you can use broth, vegetable bouillon, or even fruit juice as alternatives. Combining a variety of liquids can also create a robust flavor profile.
4. Can I braise vegetables too?
Absolutely! **Braising vegetables** is a great way to infuse flavor. Root vegetables like carrots, potatoes, and turnips respond well to the braising method and can be cooked alongside meat for a complete meal.
5. What is the difference between braising and stewing?
The main difference is the amount of liquid used and the size of the meat pieces. **Braising** typically involves larger cuts and less liquid, whereas **stewing** uses smaller pieces of meat fully immersed in liquid, leading to a thicker final dish.